This is a beginners tutorial, in this tutorial we are going to create Image Scroller application. Our aim is to display a series of full screen images side-by-side displaying each full screen image with scroll effect as you might have already seen in gallery app.
These are the main steps we will be doing in this app
Step 1 : Creating a Scroll view
Step 2 : Adding images to our project
Step 3 : Loading and displaying images
So let’s get started,
Open Xcode > Go to File > New > Project > Select ‘Single View Application’ > Name your Project Select the platform as iPhone and enable ARC, we are not going to use Storyboard so disable it.
Click ‘Next’ and save the file in your desired directory by clicking ‘Create’ on the next screen. You can leave other fields empty.
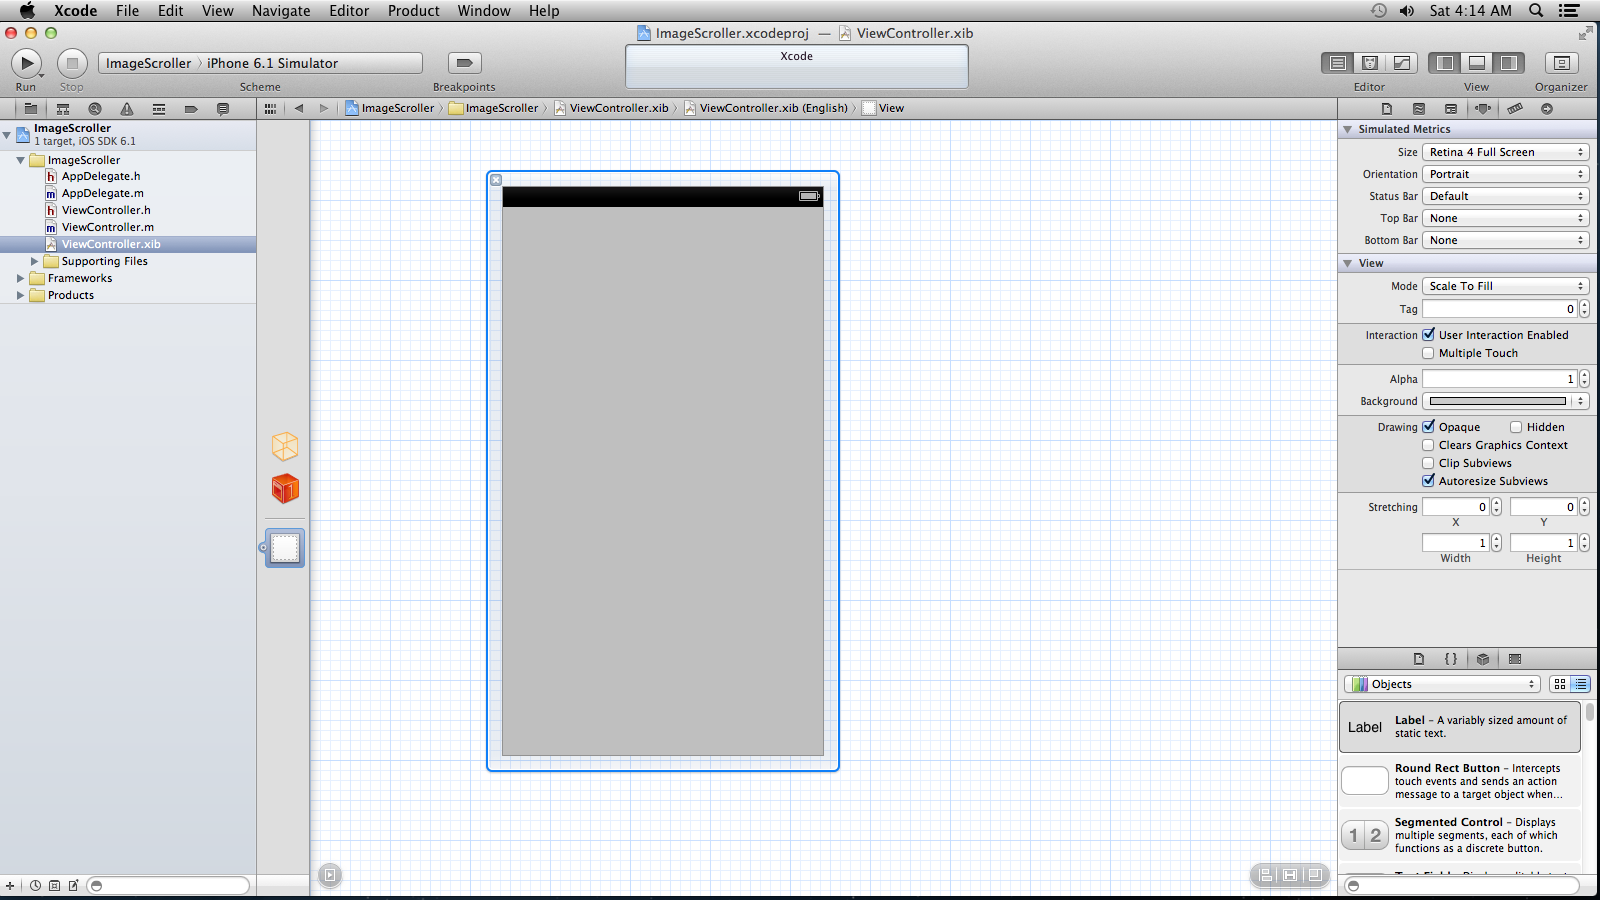
By now Xcode should open a newly created project automatically. In the left hand pane you can notice few files under project directory as shown below.
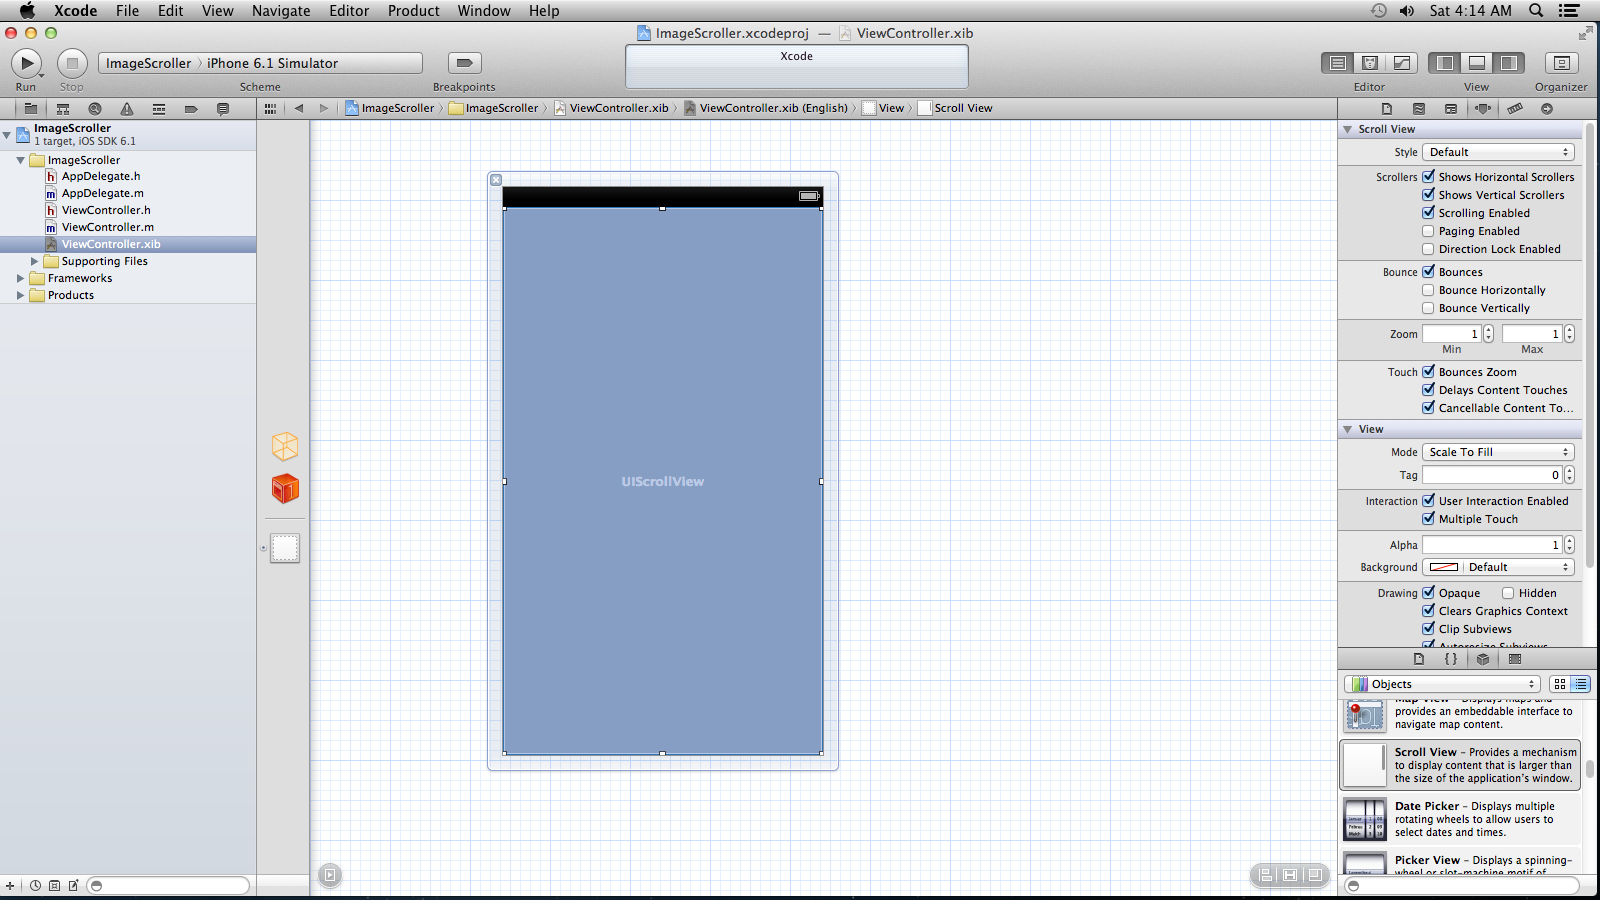
Select ‘ViewController.xib’ file, as discussed earlier our first step is to add a ‘UIScrollView’ to the main view. We will create this using ‘IBOutlet’, drag Scroll view object from objects library (in right hand bottom pane third tab) on to the View Controller’s view. Xcode will automatically adjusts the size of scroll view to the xib’s view size.
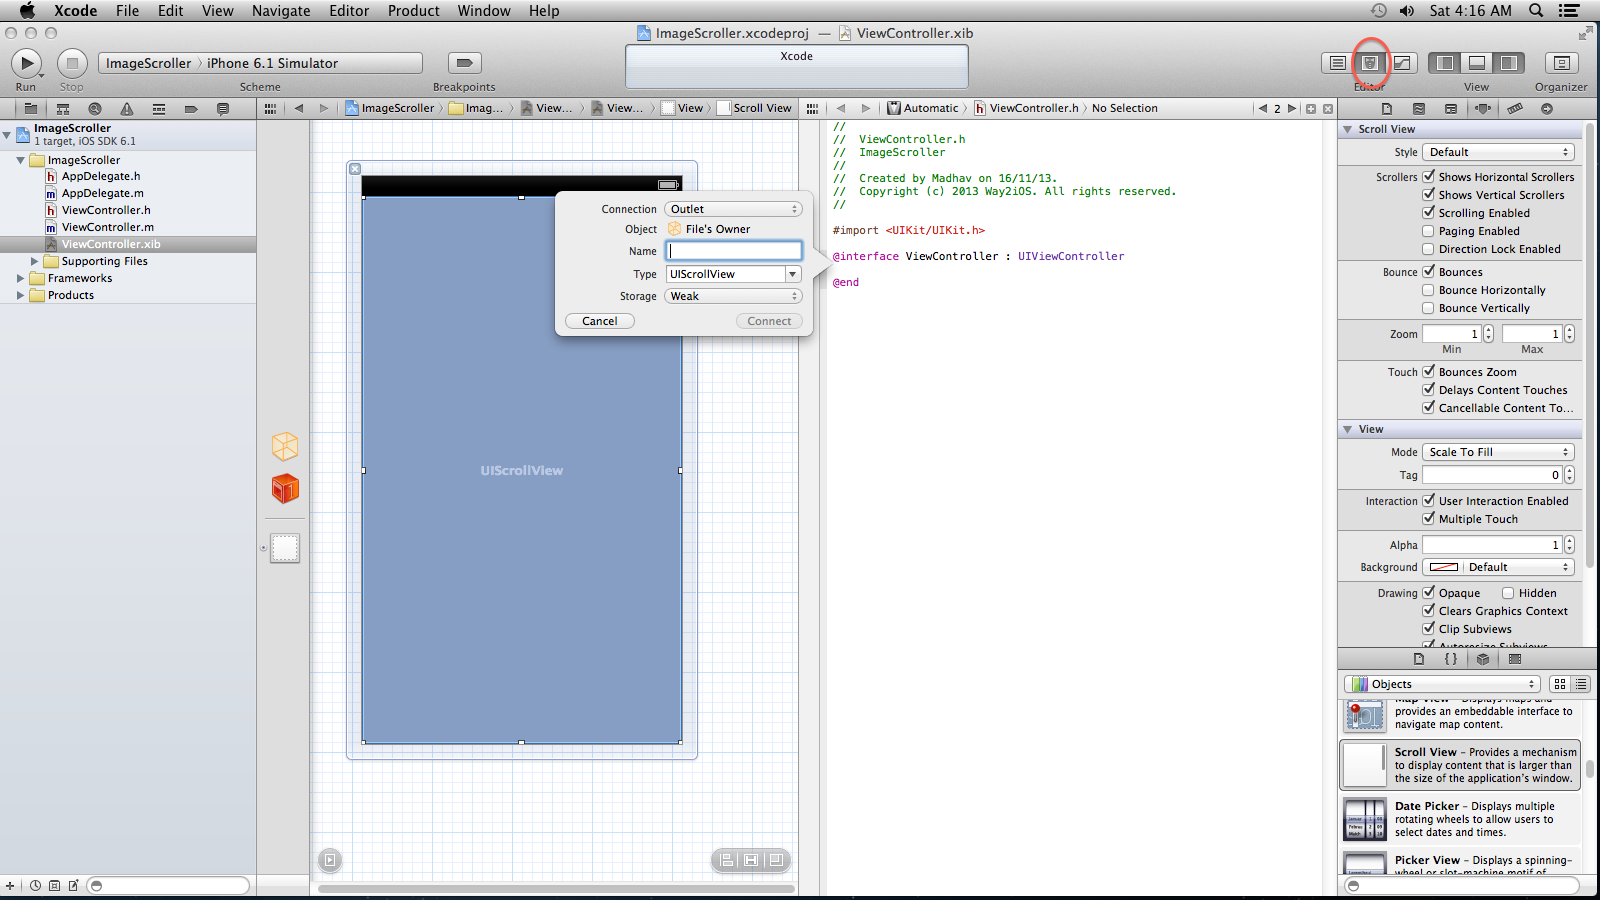
Let’s create a property for this ‘scrollview’ in .h file. To easily create a ‘IBOutlet’ in .h file we will use xcode’s assistant feature. See the below image observe the area circled in red, that’s the assistant button. By pressing assistant button xcode splits the screen and provides you with two different files on each side. Make sure each screen has either xib file or .h file. Select scrollview in xib file on one end, hold control button + mouse click and drag to the .h file on other end. A pop-up appears asking to enter the name of the outlet. Make sure connection type is ‘Outlet’.
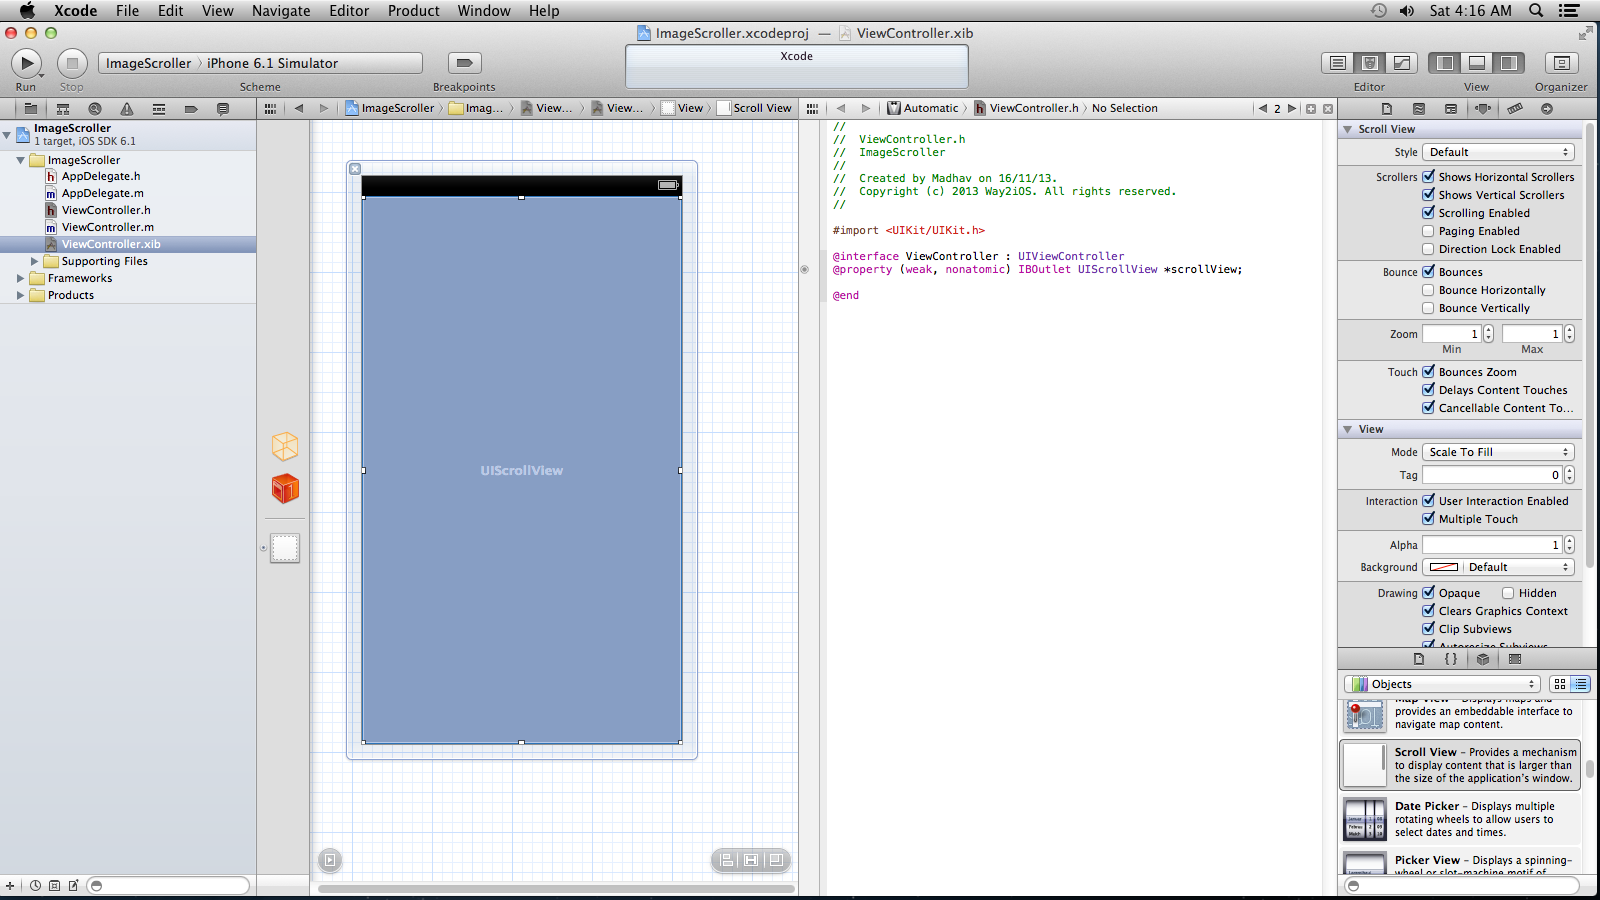
Xcode will now create a ‘IBOutlet’ property for you.
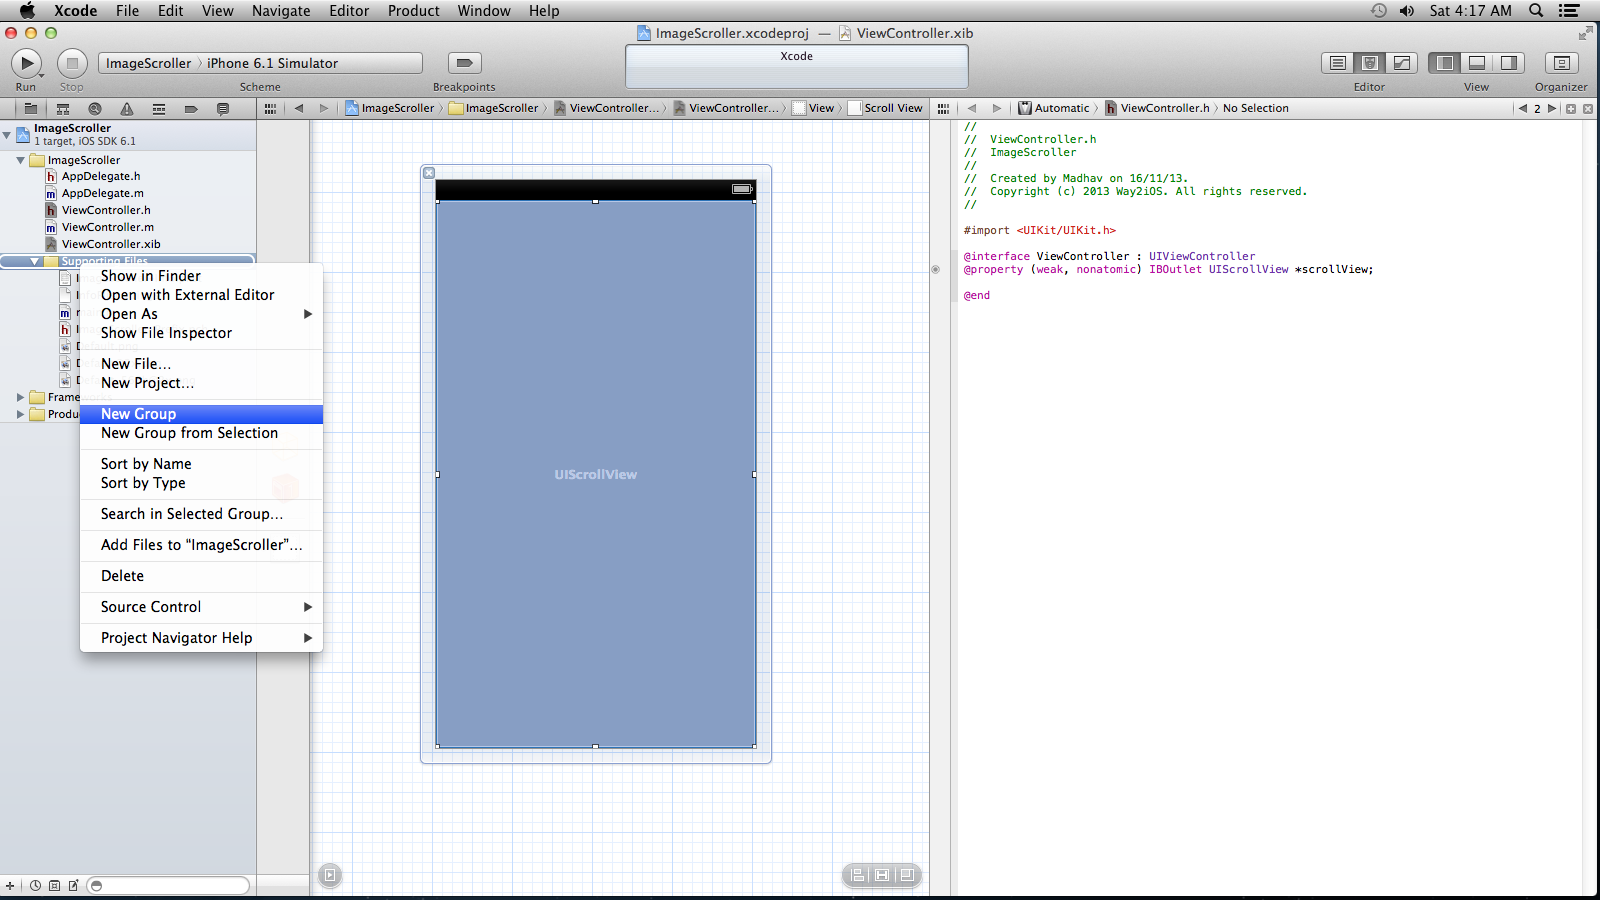
In our second step, we need to add images to our project. So let’s create a directory called “images” under which we can place all our images. To create a new directory control + click in left pane(project navigator) a menu appears select “New Group” and name it, this creates our directory.
To add images to the directory which we have created, control + click on the directory > select “Add Files to your project” from the menu appeared.
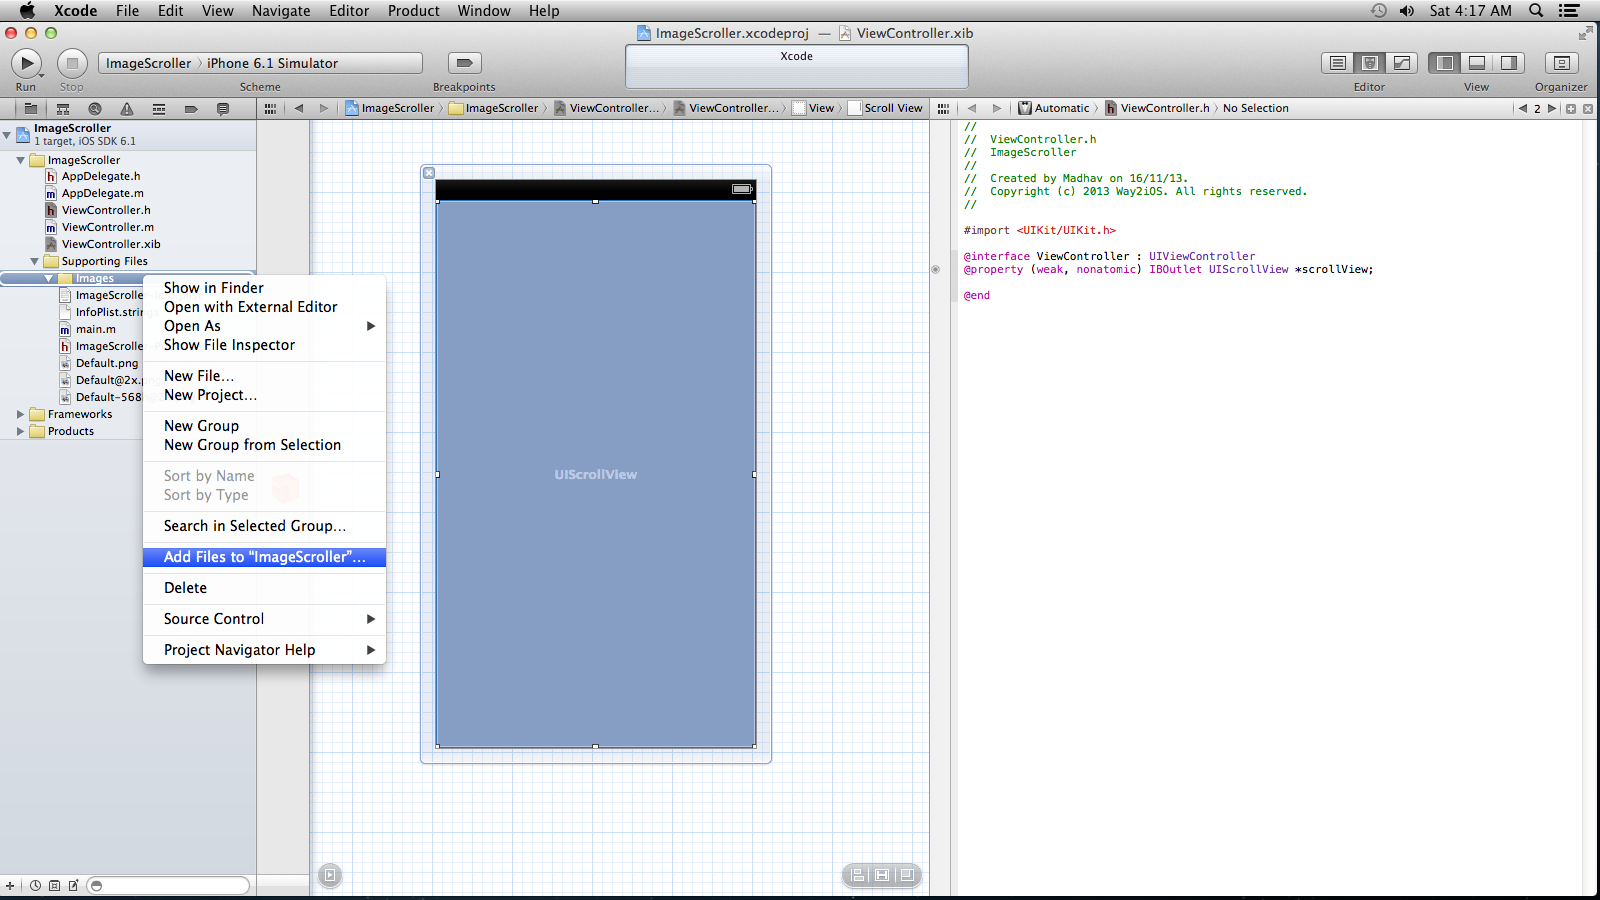
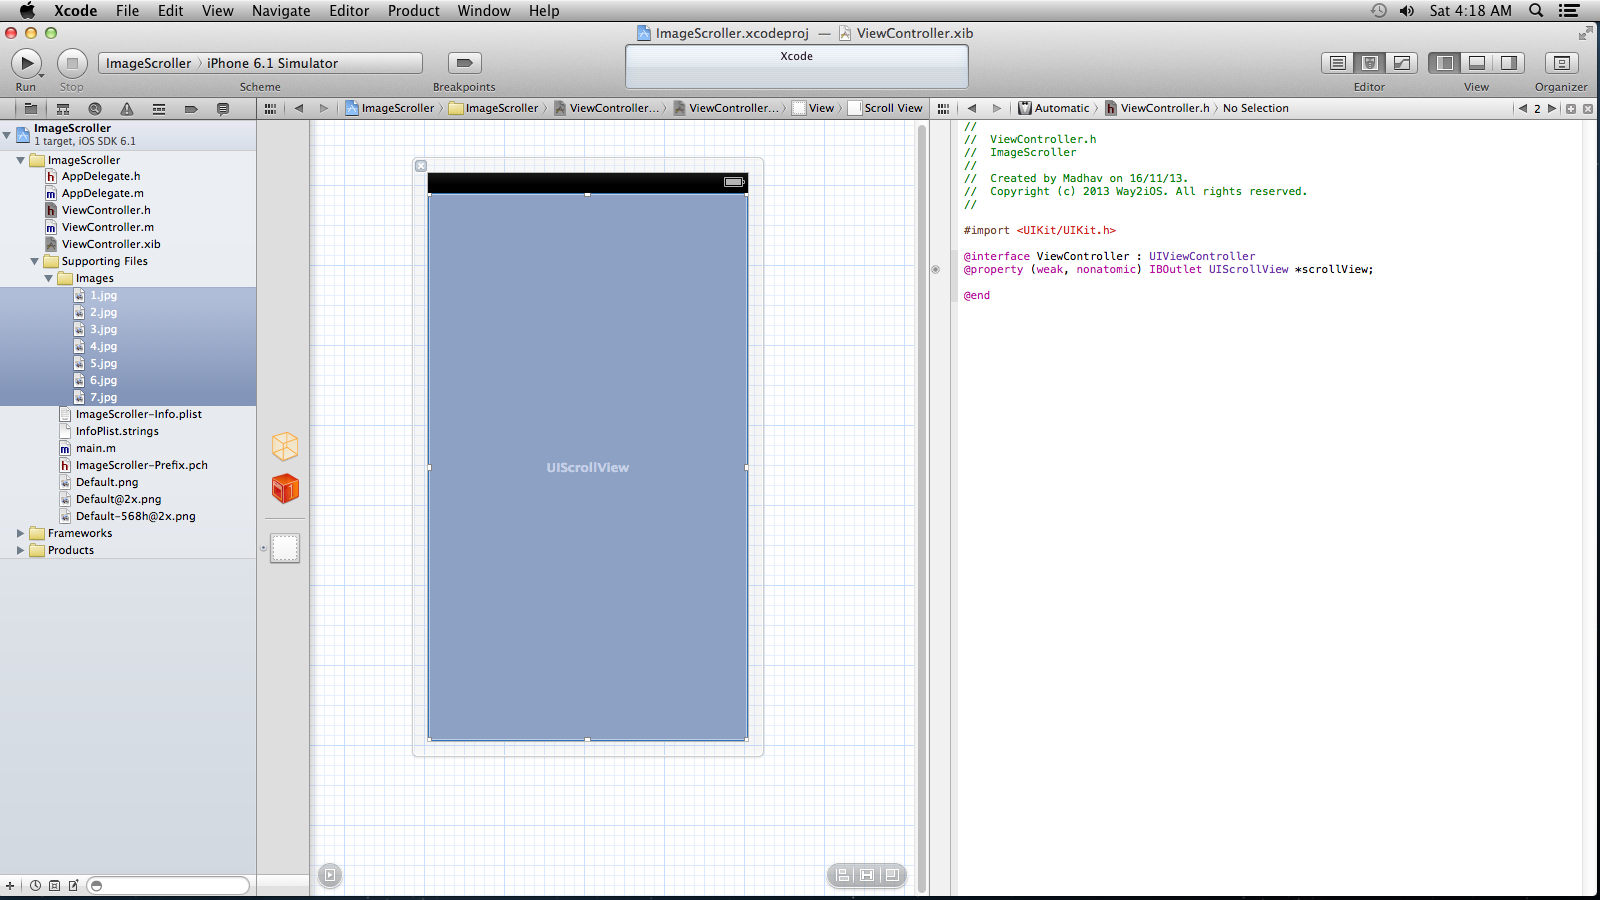
Select images you want to add to this project from the finder which has opened, make sure you select “Copy items into destination group’s folder” click finish. All selected images will now be under the directory which we have created.
We now have Scrollview and Images, let’s go to step 3 : Loading and displaying images.
Open .h file you can see the basic structure which xcode has created for us.
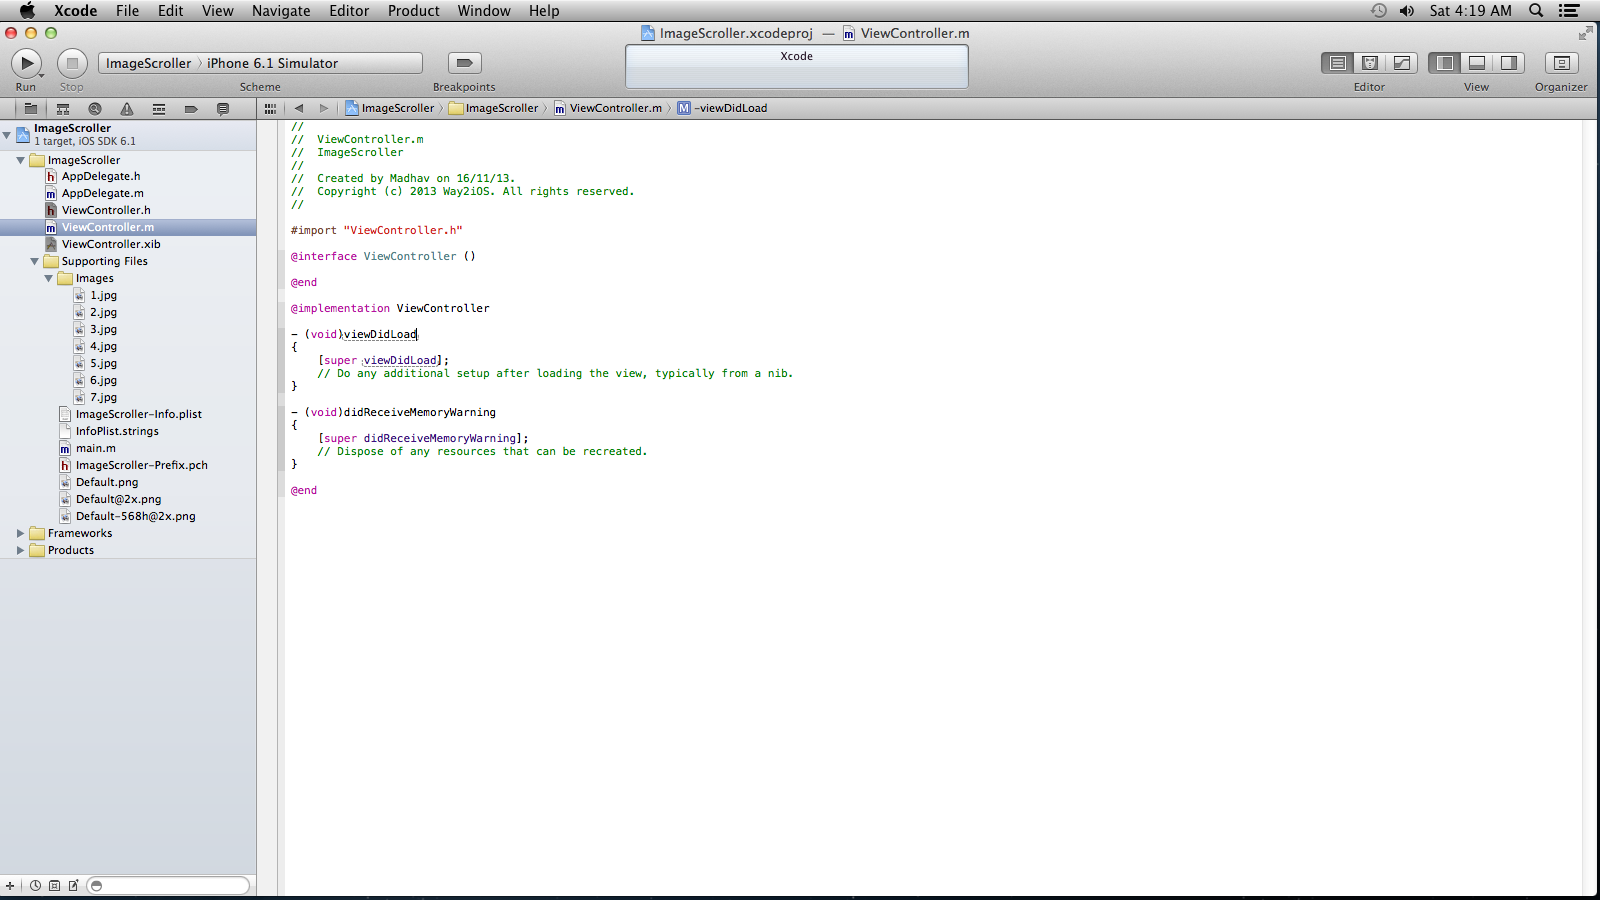
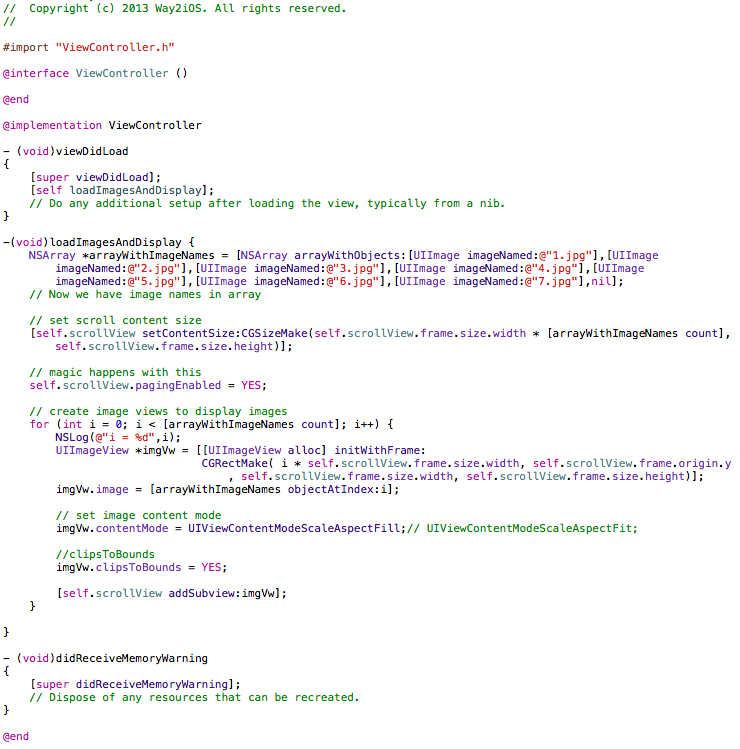
We need to add our functionality to load images and display them. so create a method.

In this method to load images we’ll use NSArray to hold all image objects.
Lets add these images to an array
In the array above we have added 7 images, that means to need to have 7 ImageViews to display each image. To hold 7 image views, we need to extent the content size of ScrollView based on number of images. Right now ScrollView has 320 width and 568 height(iphone 4 inch)as its size, that means only a single image will be visible since Imageview will also be assigned to 320 width and 568 height. To add all image views to scrollview we need to extend the scroll view’s area. Since all images will be of same height we don’t need to alter scroll view’s height but to add images side-by-side we need to extend the width of scroll view.

Using ‘contentSize’ property of Scroll View we have extended the scroll view based on the total images we have. Now we have scrollview with desired area to place all our image views which we will create in a while.

Lets create UIImageViews and add them to scroll view. Since we have 7 images we shall create 7 image views to display each image. Using ‘for’ loop lets create 7 image views and assign an image to each image view. To arrange each image side-by-side we just need to change x-origin of each image view using scroll view’s width as a factor.So the first image view will have 0 as its x-origin, 2nd image view will have 320 as x-origin, 3rd 640, 4th 960 etc.

Now assign a image from ‘arrayWithImageNames’ array to a imageview using array index. Then add each image view to the scrollview. This ‘for’ will be executed 7 times as per number of images we have in our array.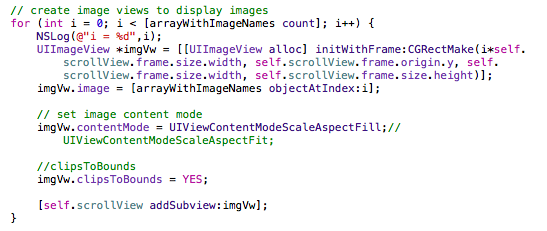
Try to run the project make sure to call this method from viewDidLoad method.
If everything goes well you can see a view with images which can be scrolled.If you find images are overlapping each other(if the image size is higher than image view size) then set image view clipsToBounds to Yes. You can play around with imageview’s ‘contentMode’ property by assigning different values. In our case we have assigned ‘UIViewContentModeScaleAspectFill’ to image view’s ‘contentMode’ property.
Now run the project.
You may feel something is missing, so lets add some magic to our app by setting Scroll View’s ‘pagingEnabled’ to ‘YES’ and Run the app.
By the end of this tutorial your complete code may look like this.
Now you can get admission to the top intentional colleges with the help of the best college in Chandigarh who provide the best education and training that is affiliated from the top bba colleges in uk. Now you must take admission to SOIS and make your dream come true to get admission in top bba colleges in uk.
ReplyDeleteDo you want the best quality uv ink for your printer? Then must visit the best and authorized uv ink supplier in india https://phuvprinter.com/product/uv-ink/ like PH UV Printer. Yes, it is the only printer able to provide the best uv ink at affordable and reasonable prices in India.
ReplyDeleteIf you want to know more about the kricpy khera gill https://krispykhera.com/ then you should visit the official website. There you'll find about us page on which there is all information about krispy khera including her social activities and personal and professional life. But still there are many people who are not happy with the social activities did by krispy khera and spread negative reviews over digital world. She hired the best digital marketing company in chandigarh - digital expert solutionhttps://digitalexpertsolution.com/ to get rid of this issue.
ReplyDeletehttps://marketing.net.pk is one of the Top Marketing Agency in Pakistan or as some of our Clients says one of the Best Marketing Company in Pakistan , Our Decade of experience in the Filed of Digital Marketing give us the edge to proform the Best Marketing Services in Pakistan .
ReplyDelete